部署到 GitHub
前期准备
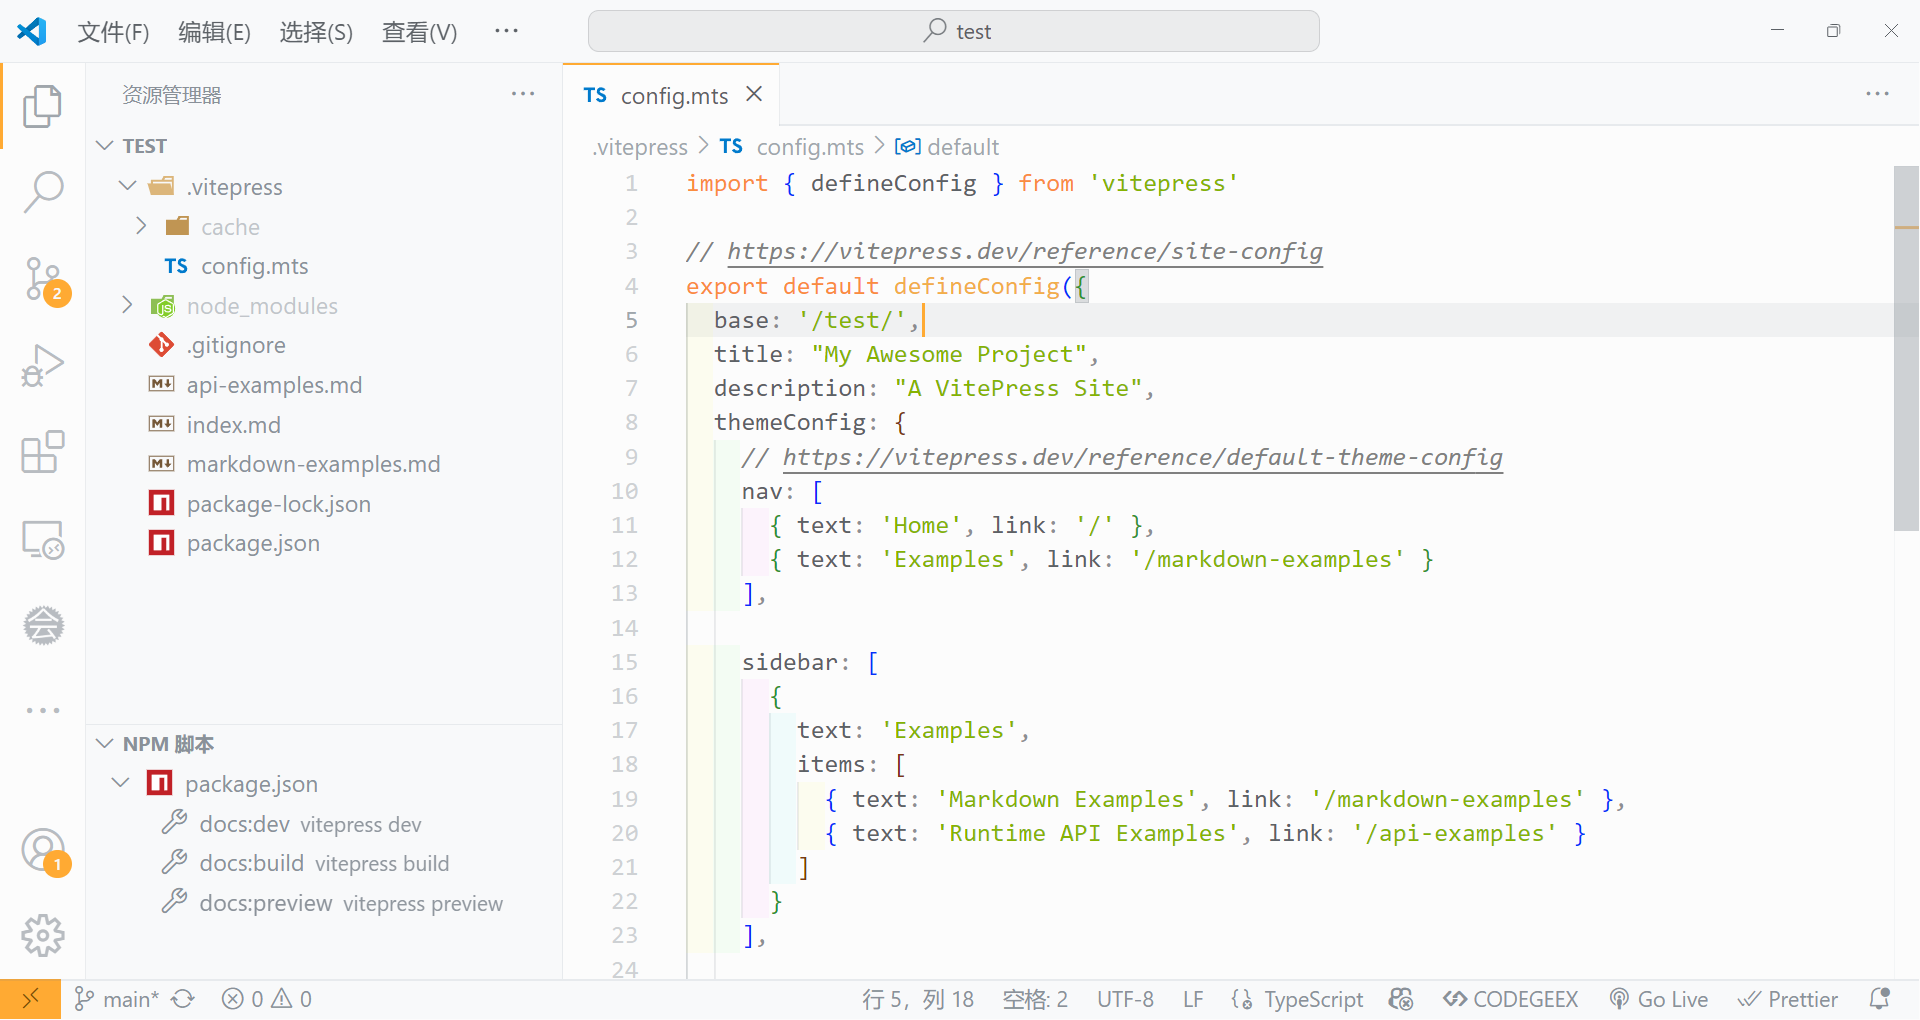
- 首先,添加一个
base选项,设置根路径,格式为/Github仓库名/,我这里填写/test/
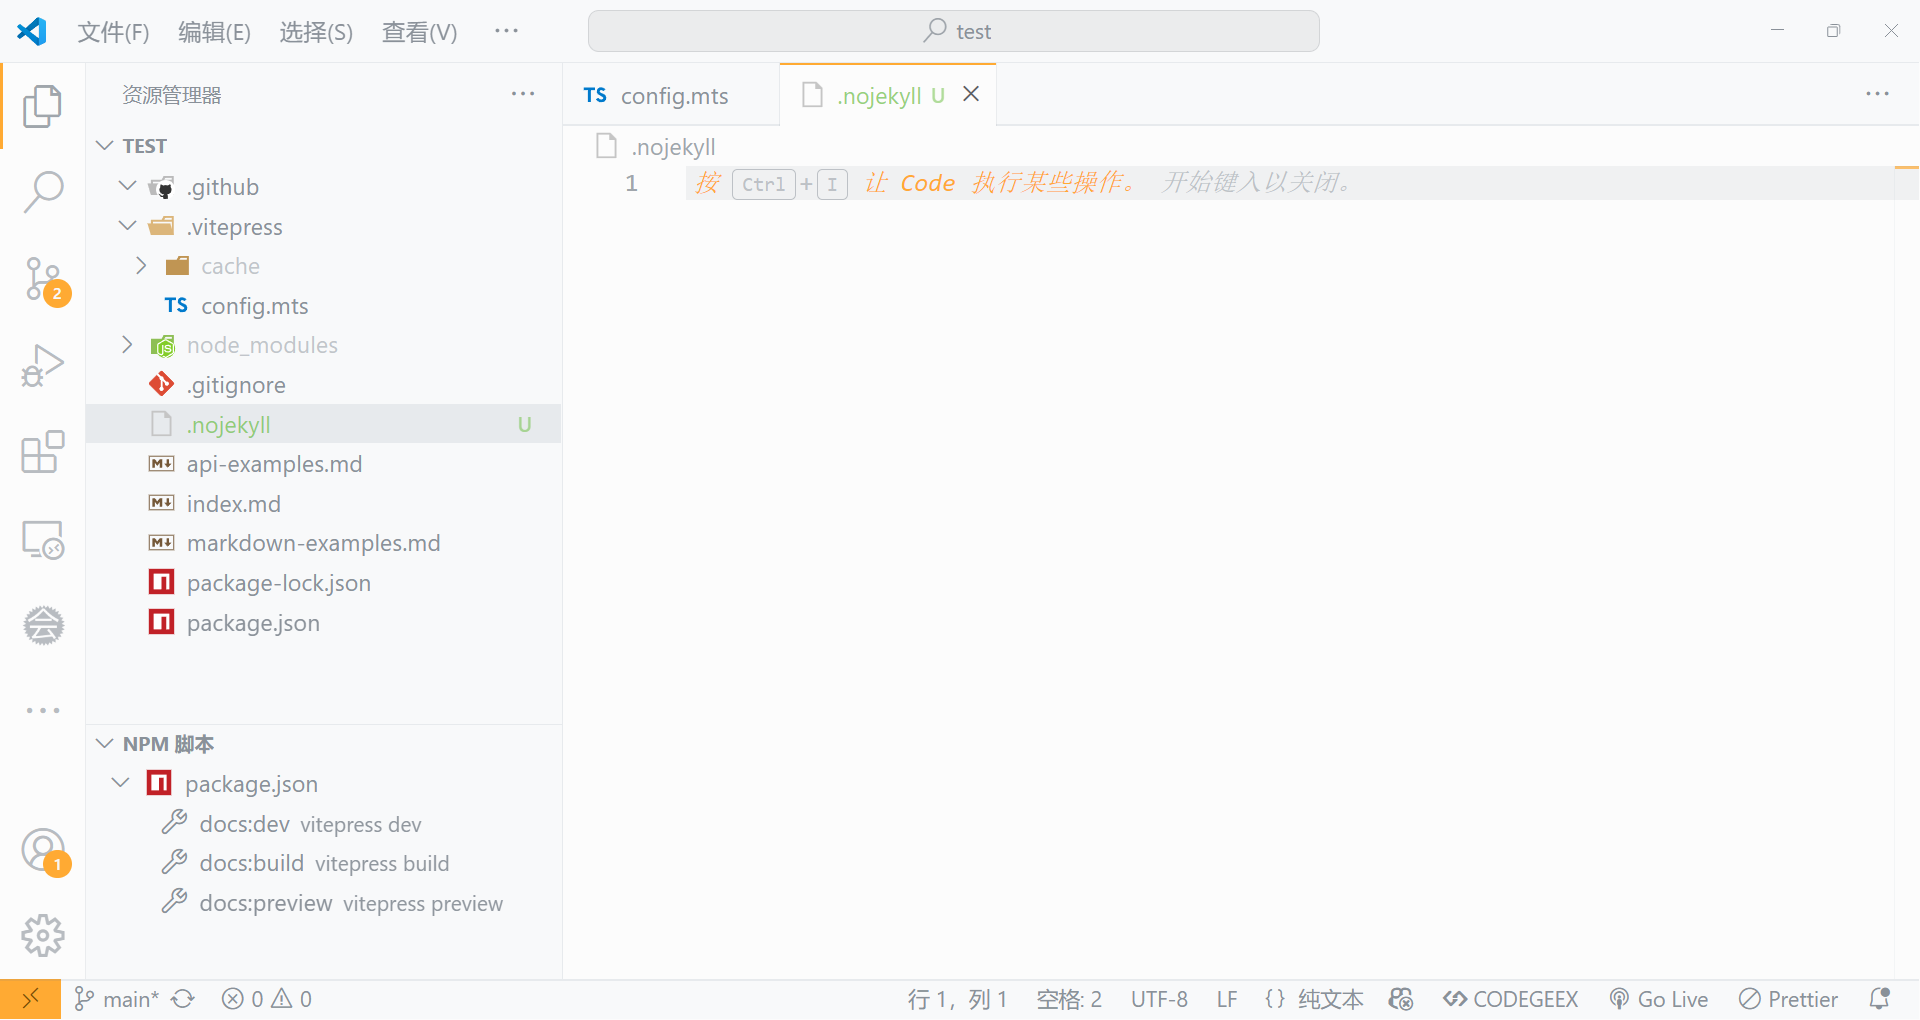
- 在根目录下新建一个名为
.nojekyll的空文件
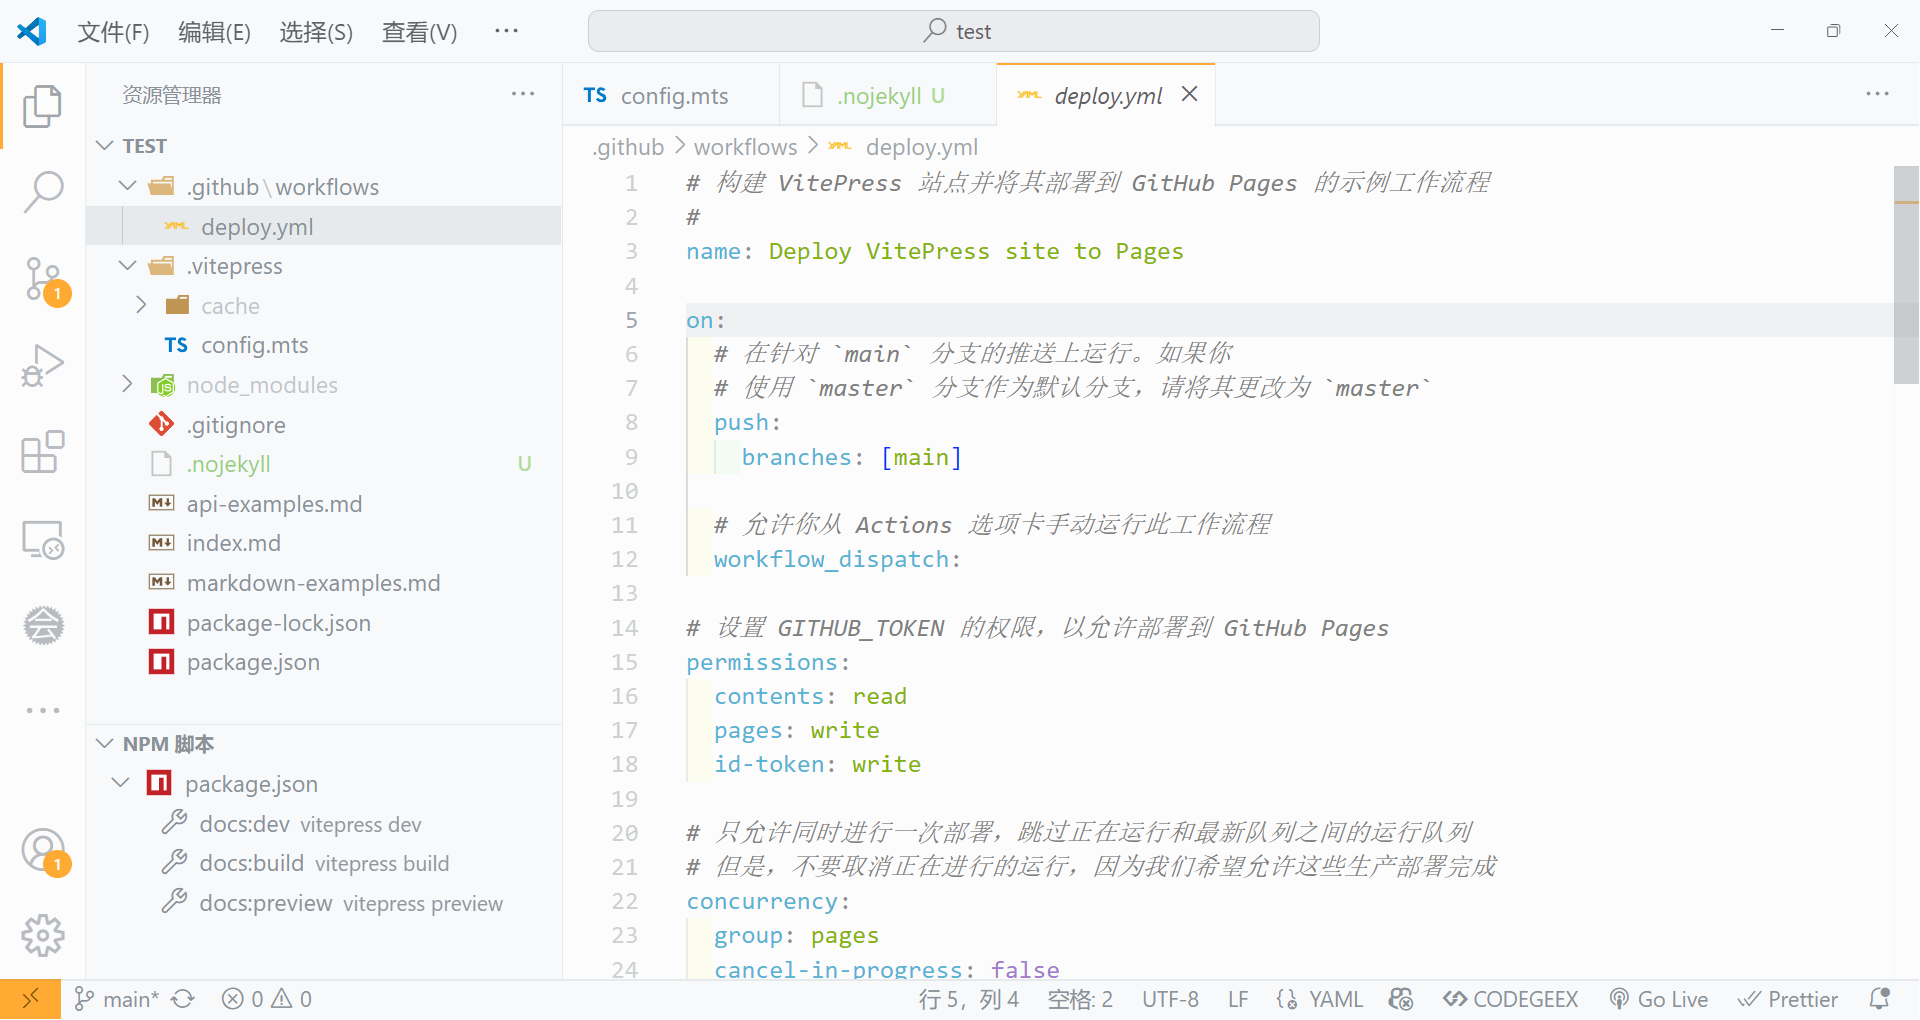
- 然后在
.github/workflows目录下创建一个deploy.yml文件,内容如下:
yaml
# 构建 VitePress 站点并将其部署到 GitHub Pages 的示例工作流程
#
name: Deploy VitePress site to Pages

on:
  # 在针对 `main` 分支的推送上运行。如果你
  # 使用 `master` 分支作为默认分支,请将其更改为 `master`
  push:
    branches: [main]

  # 允许你从 Actions 选项卡手动运行此工作流程
  workflow_dispatch:

# 设置 GITHUB_TOKEN 的权限,以允许部署到 GitHub Pages
permissions:
  contents: read
  pages: write
  id-token: write

# 只允许同时进行一次部署,跳过正在运行和最新队列之间的运行队列
# 但是,不要取消正在进行的运行,因为我们希望允许这些生产部署完成
concurrency:
  group: pages
  cancel-in-progress: false

jobs:
  # 构建工作
  build:
    runs-on: ubuntu-latest
    steps:
      - name: Checkout
        uses: actions/checkout@v4
        with:
          fetch-depth: 0 # 如果未启用 lastUpdated,则不需要
      # - uses: pnpm/action-setup@v3 # 如果使用 pnpm,请取消此区域注释
      #   with:
      #     version: 9
      # - uses: oven-sh/setup-bun@v1 # 如果使用 Bun,请取消注释
      - name: Setup Node
        uses: actions/setup-node@v4
        with:
          node-version: 22
          cache: npm # 或 pnpm / yarn
      - name: Setup Pages
        uses: actions/configure-pages@v4
      - name: Install dependencies
        run: npm ci # 或 pnpm install / yarn install / bun install
      - name: Build with VitePress
        run: npm run docs:build # 或 pnpm docs:build / yarn docs:build / bun run docs:build
      - name: Upload artifact
        uses: actions/upload-pages-artifact@v3
        with:
          path: .vitepress/dist

  # 部署工作
  deploy:
    environment:
      name: github-pages
      url: ${{ steps.deployment.outputs.page_url }}
    needs: build
    runs-on: ubuntu-latest
    name: Deploy
    steps:
      - name: Deploy to GitHub Pages
        id: deployment
        uses: actions/deploy-pages@v4
最终目录结构如下:
上传代码
本地提交,发布分支并上传到 Github 仓库
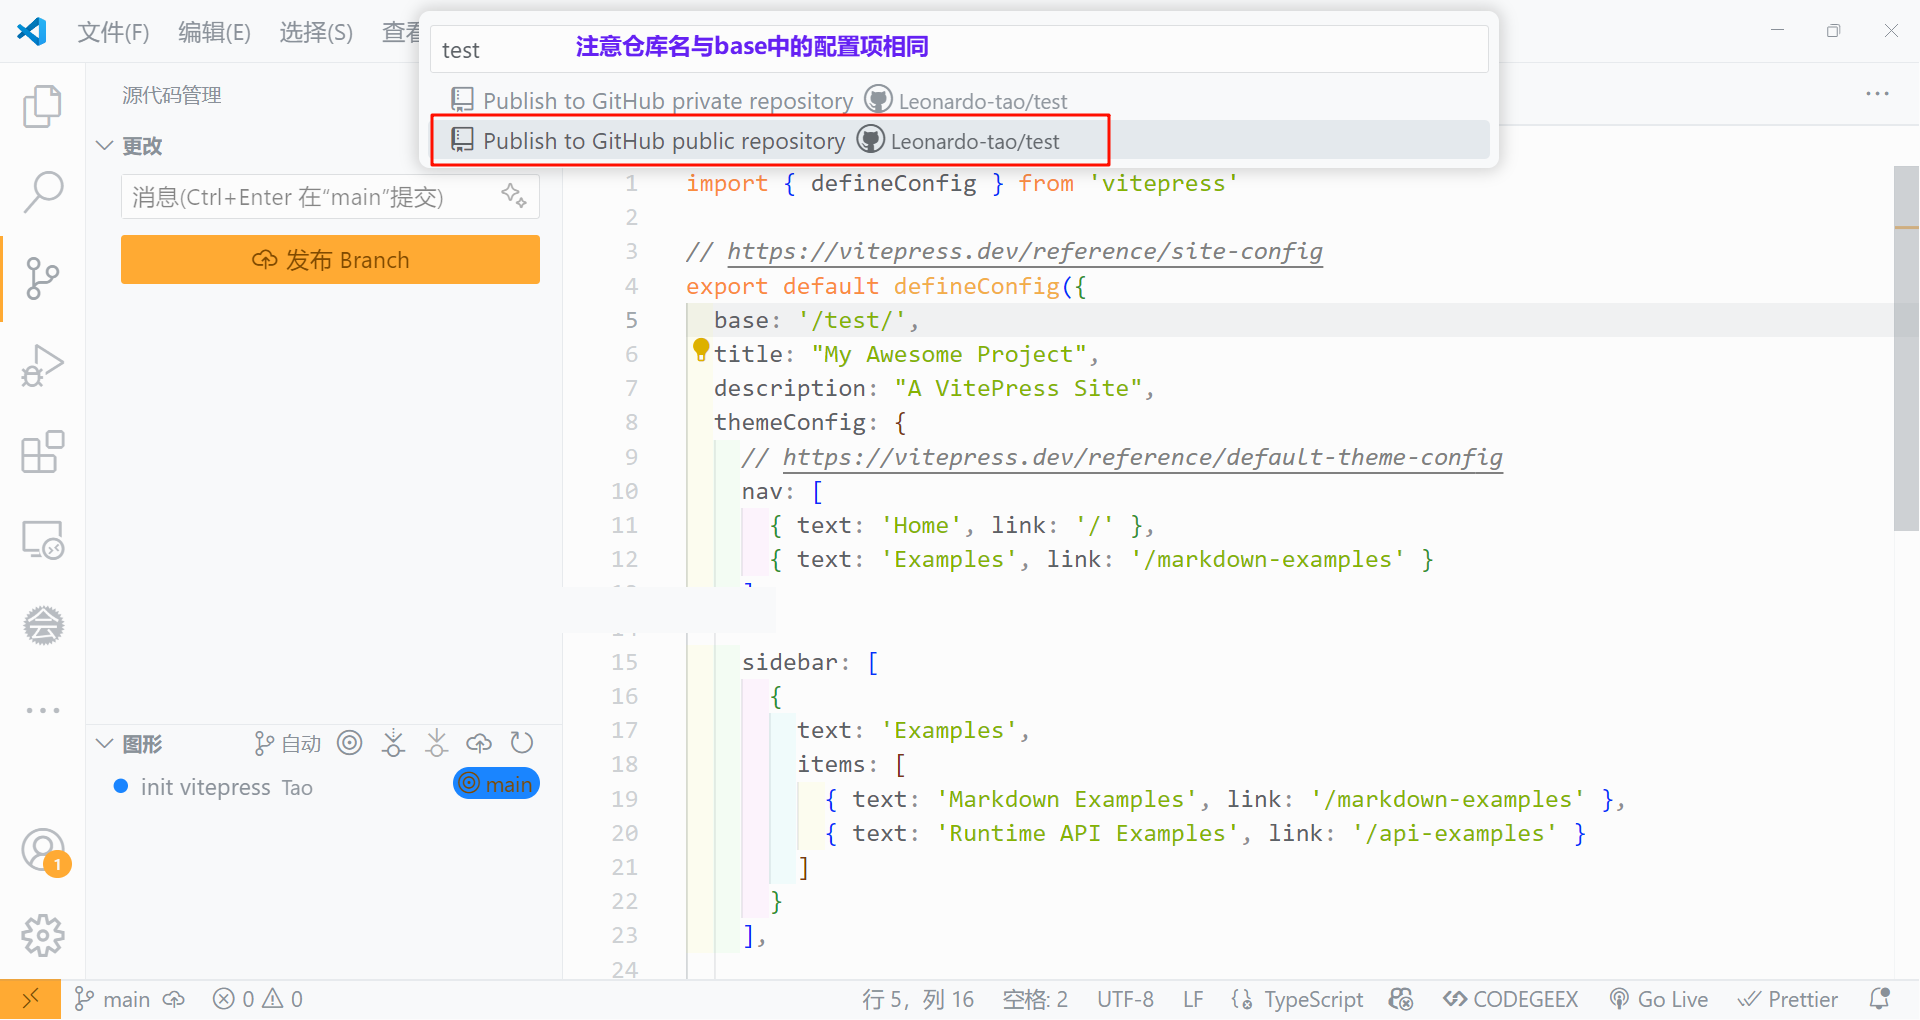
上传完成,在 Github 中查看: 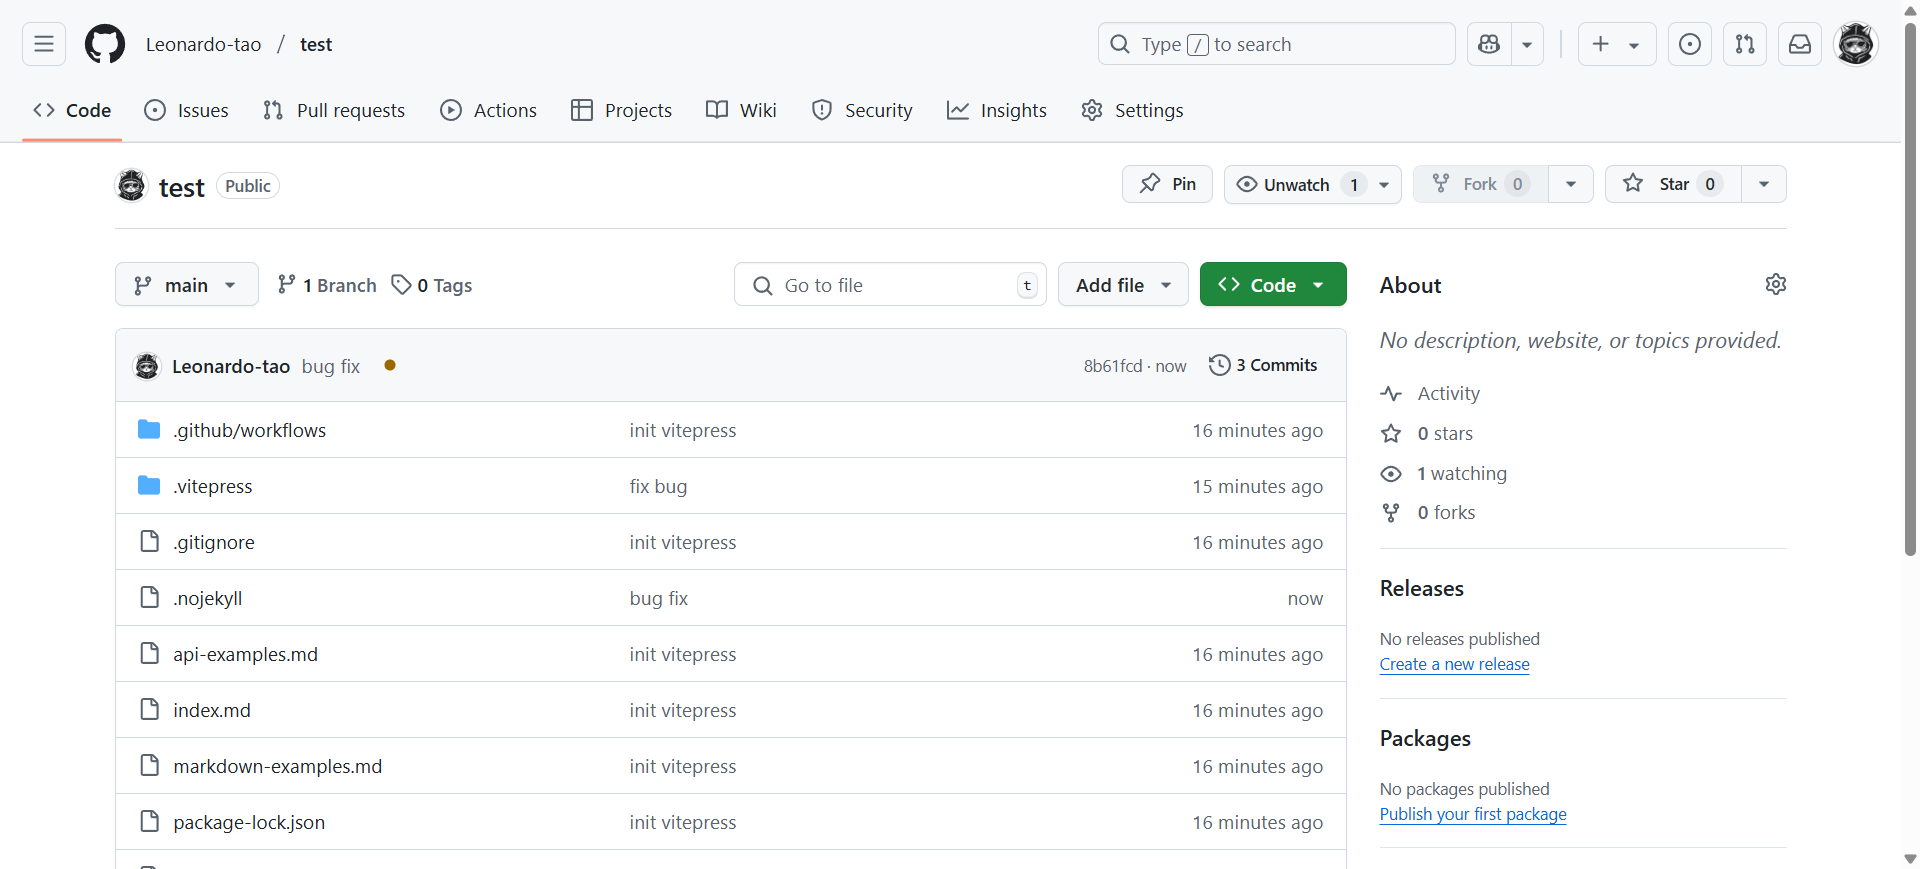
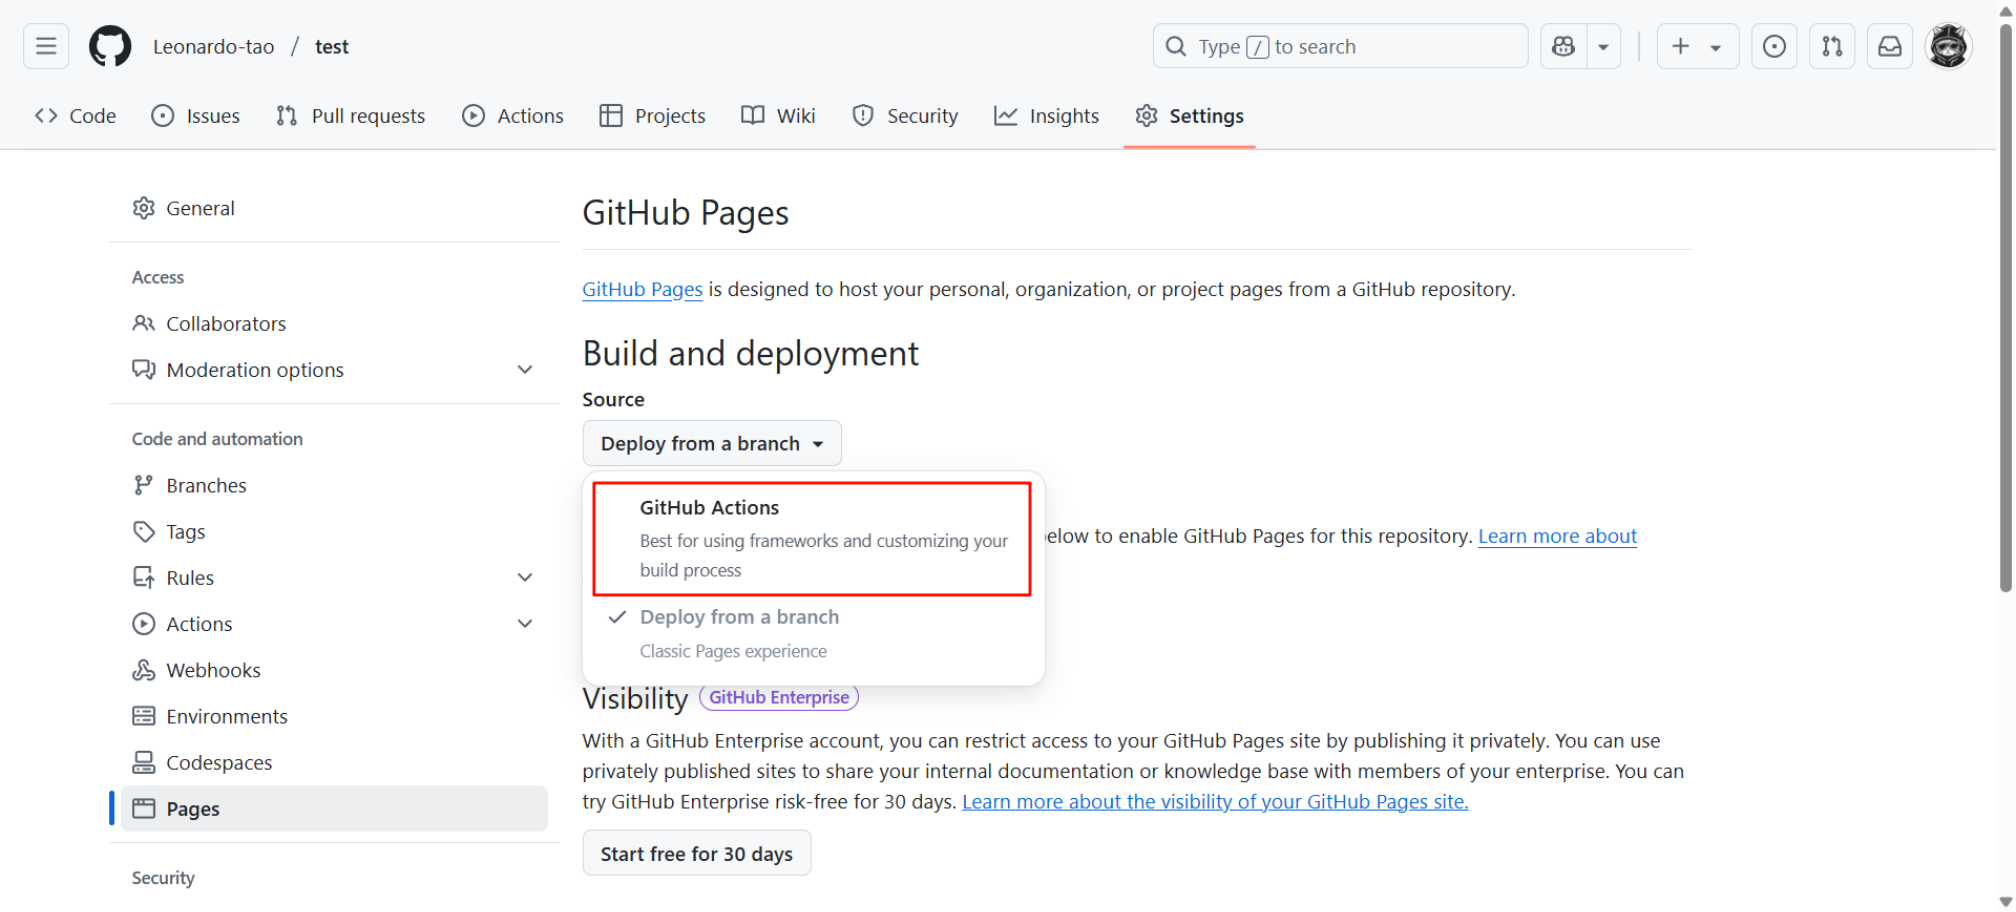
设置任务流
进入到 Settings > Pages ,选择 Github Actions ,等待部署完成就好了
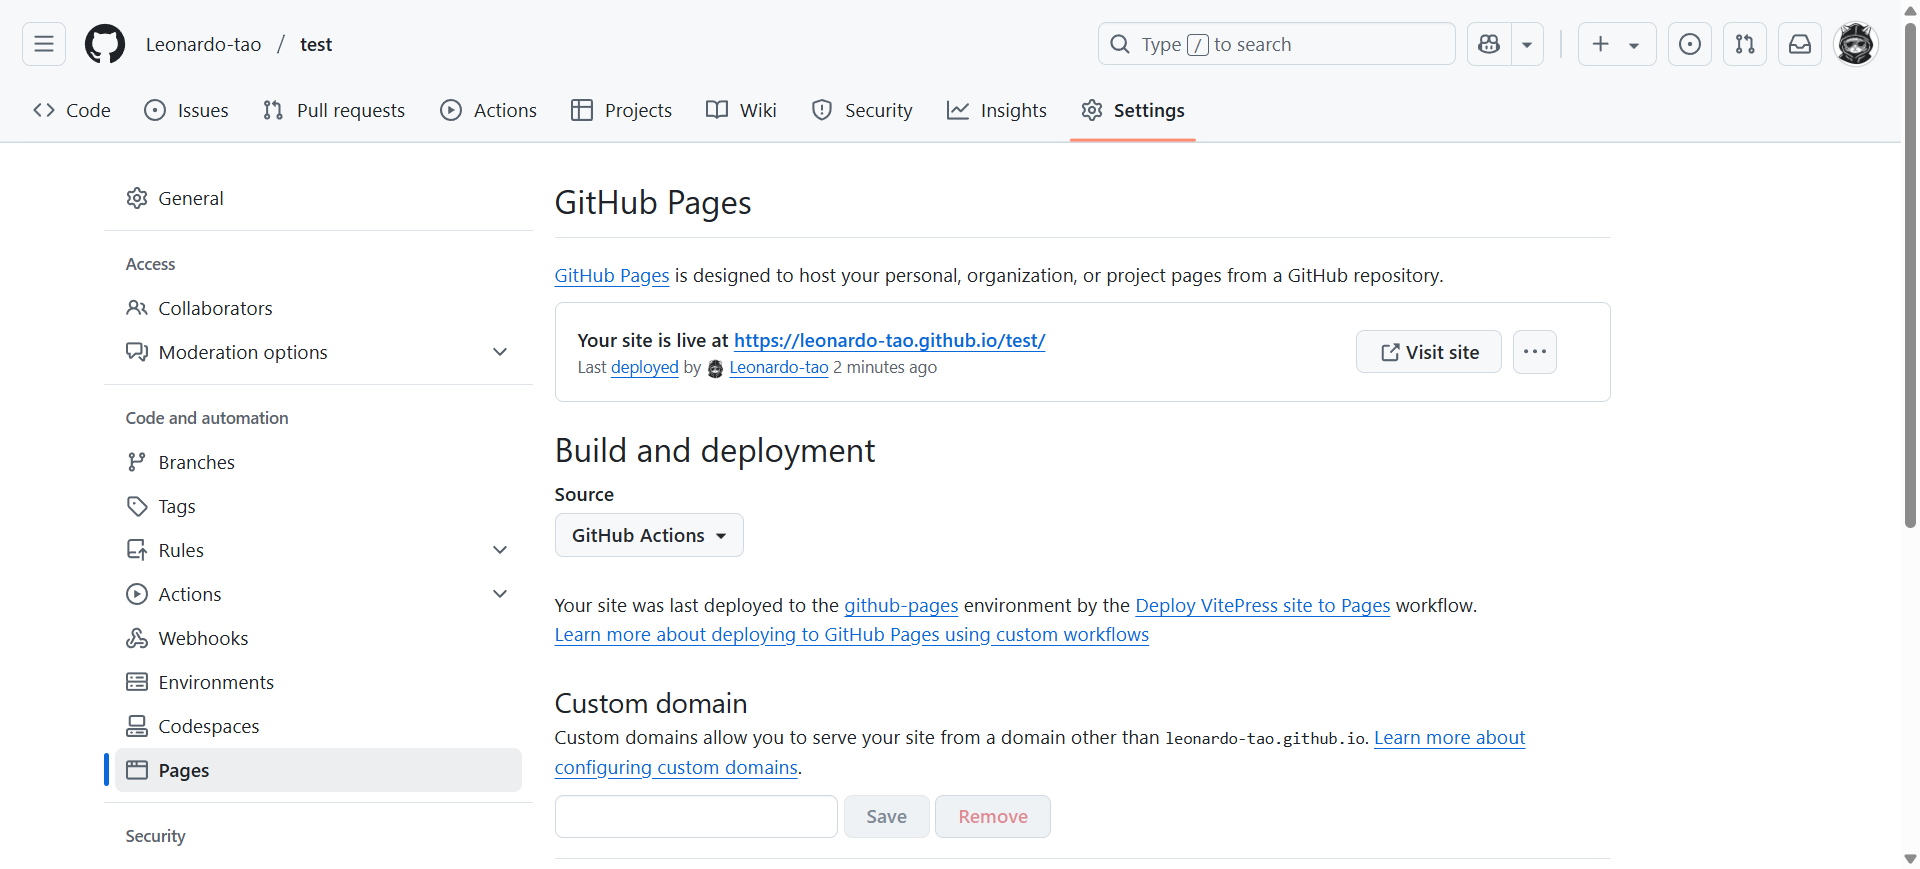
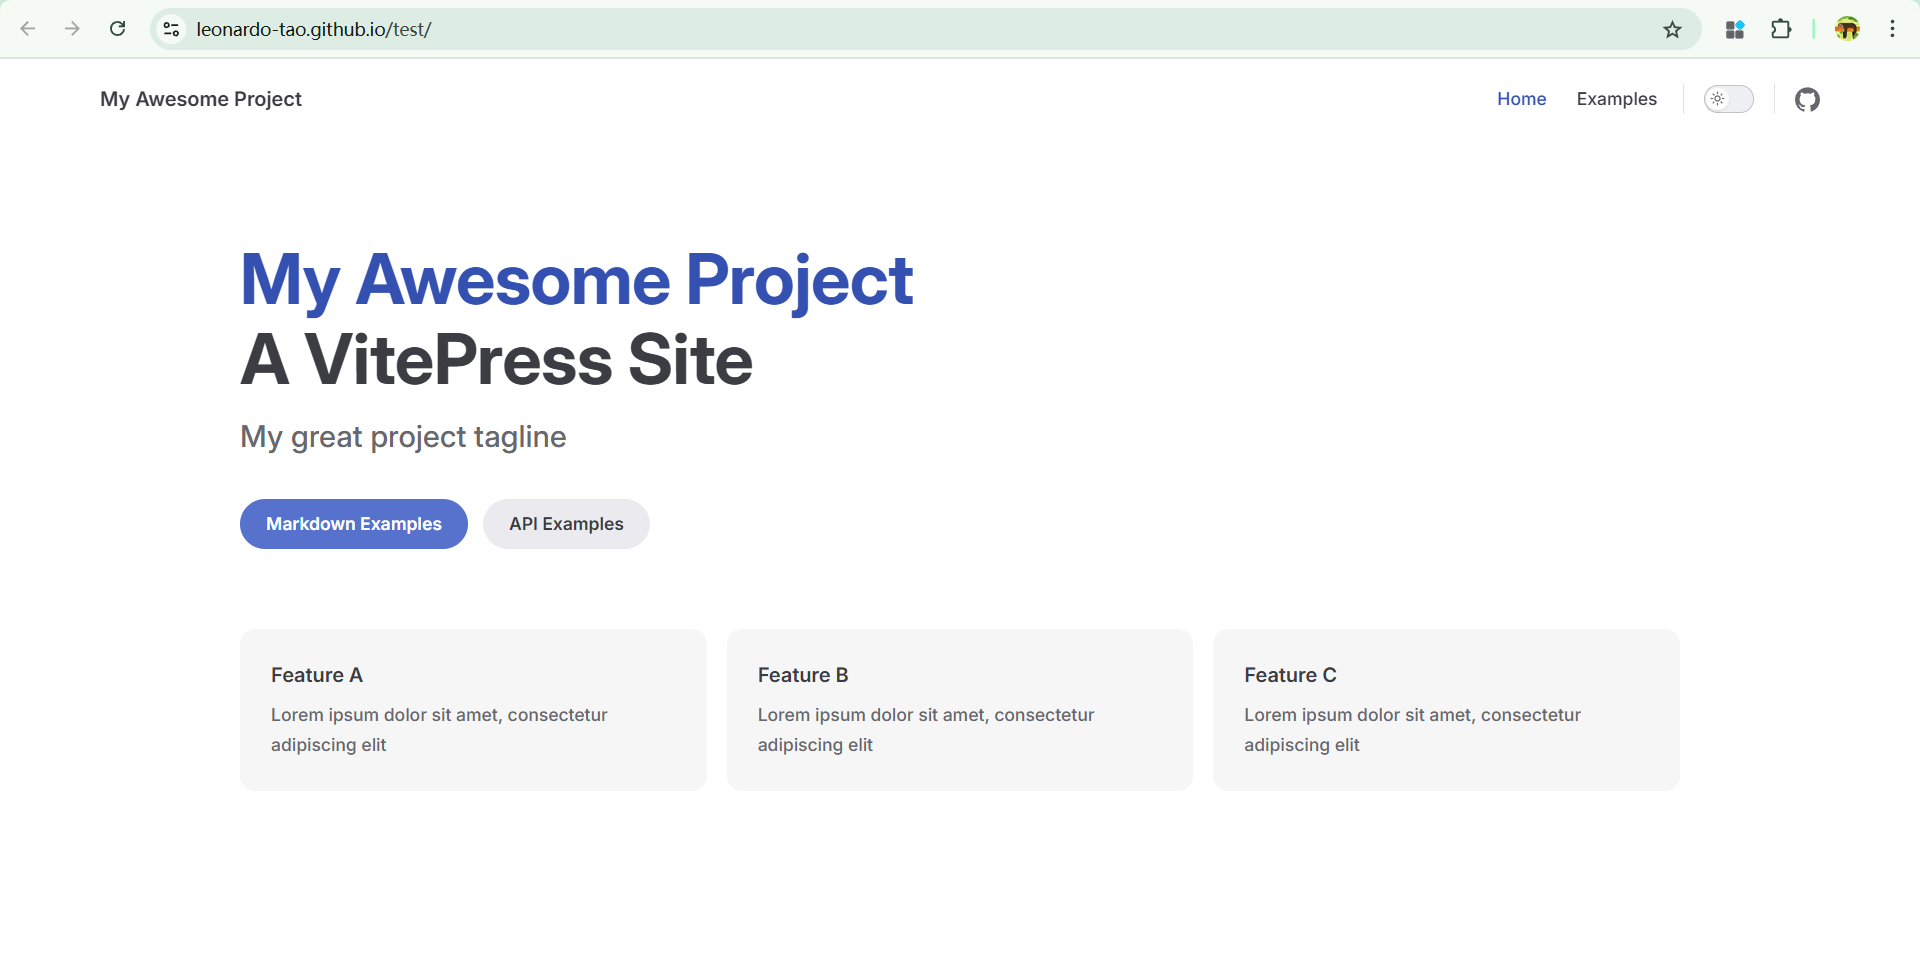
大功告成🎉
现在可通过 yourName.github.io/仓库名/ 来访问 VitePress 了,并且在每次提交代码后都会自动构建和部署
遇到的问题
在执行 Upload artifact 时,报错提示:
sh
tar: docs/.vitepress/dist: Cannot open: No such file or directory
tar: Error is not recoverable: exiting now
是由于选择了不同的根目录,需要在 deploy.yml 中第 53 行修改一下打包路径
yaml
- name: Upload artifact
        uses: actions/upload-pages-artifact@v3
        with:
          path: yourPath/.vitepress/dist
将 yourPath 改为你设置的 根路径
部署好之后,发现界面缺少 CSS 样式
检查是否缺少 .nojekyll 文件